F115 – Courses
Overview
The Courses feature allows for creating, scheduling, selling, and managing courses offered by the club. Courses can be purchased by both members and non-members. Course enrollment can be managed using the Course Report.
Topics Covered
•Creating a Course
•Selling a Course to a Non-Member
•Selling a Course to a Member
•Running the Course Report
Creating a Course
1.Log in to the Club tier
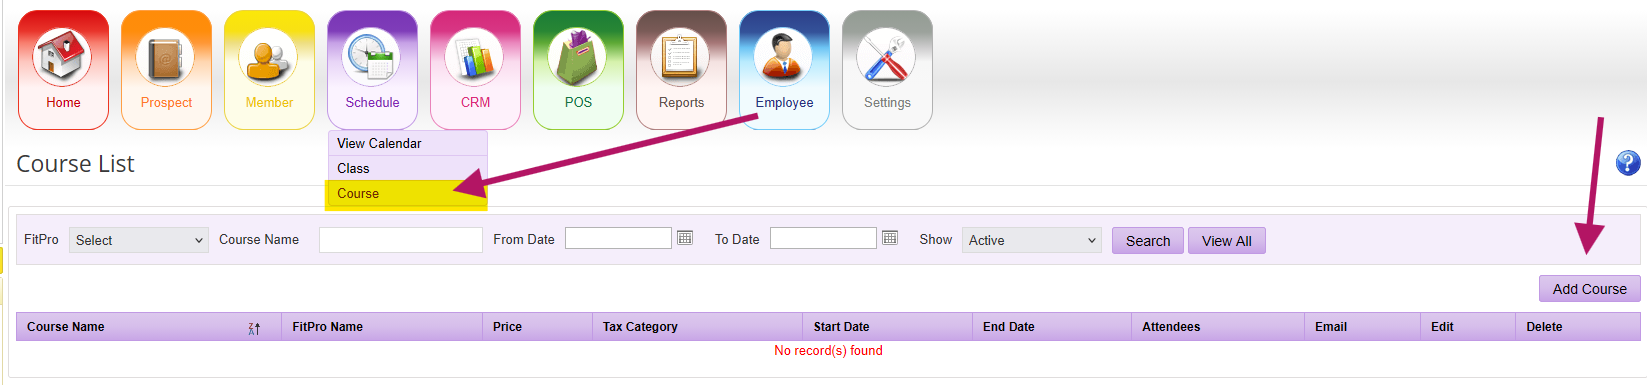
2.Go to Schedule
3.Scroll to the Course section
4.Click Add Course
5.Complete the course information, including the course description and any other required fields
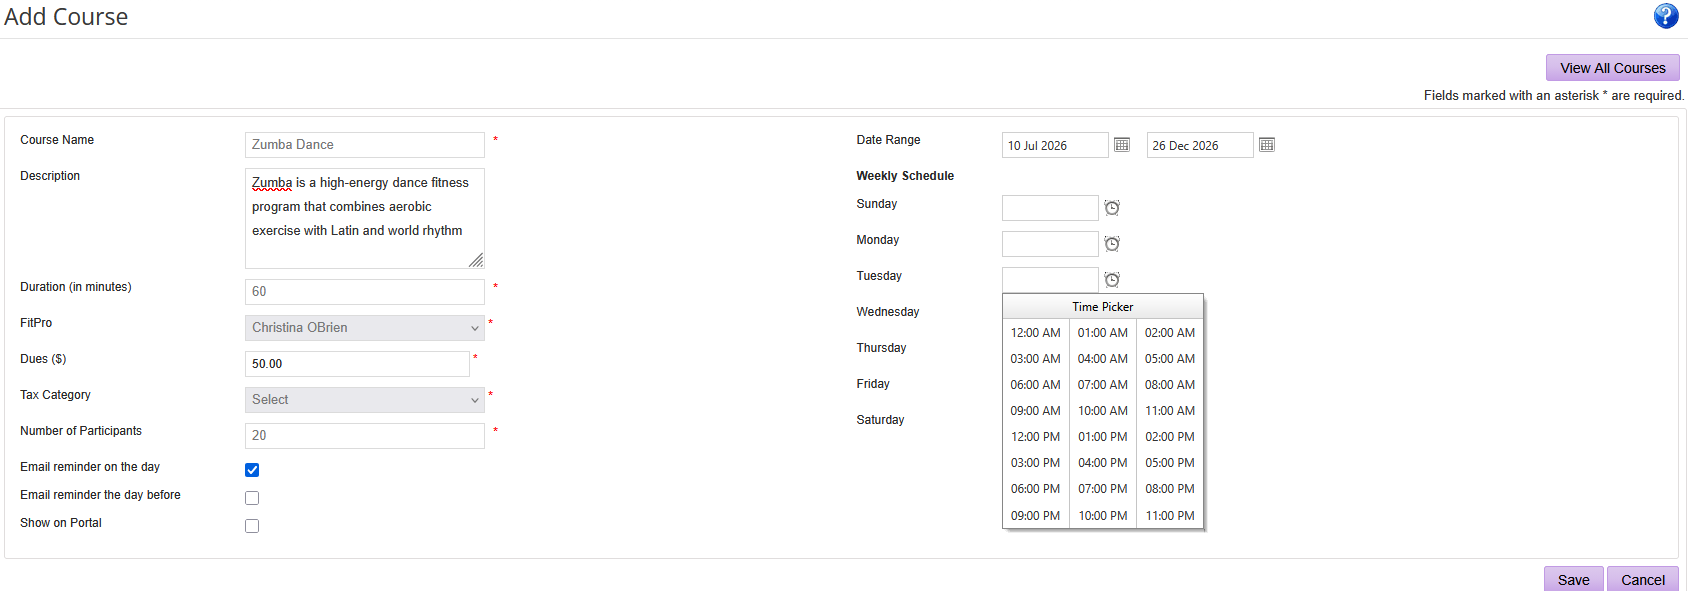
6.Click Save
The new course is added to the Course List

Viewing the Course on the Calendar
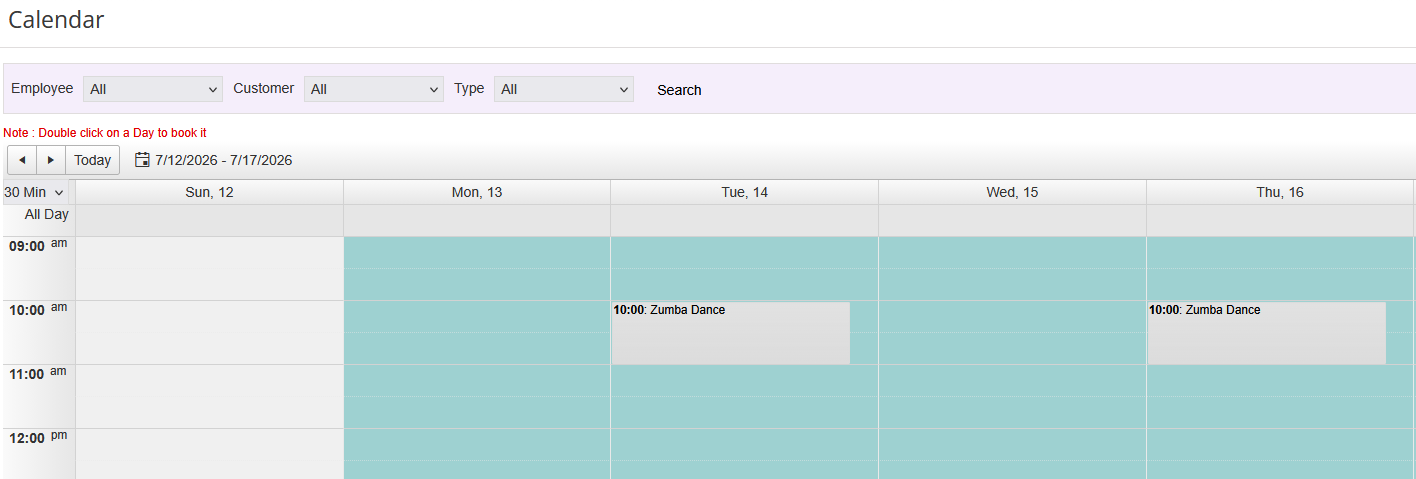
To verify scheduled Courses
1.Open the Calendar
2.Locate the course on the scheduled date and time
Selling a Course to a Non-Member
Selling a course, the software will require basic information from the course participant
1.Click POS
2.Leave the Member/Prospect field blank
3.Click Course in the POS Add Invoice screen
4.Select the course from the Course drop-down list
5.Click Save
6.A blank prospect form will appear to enter details
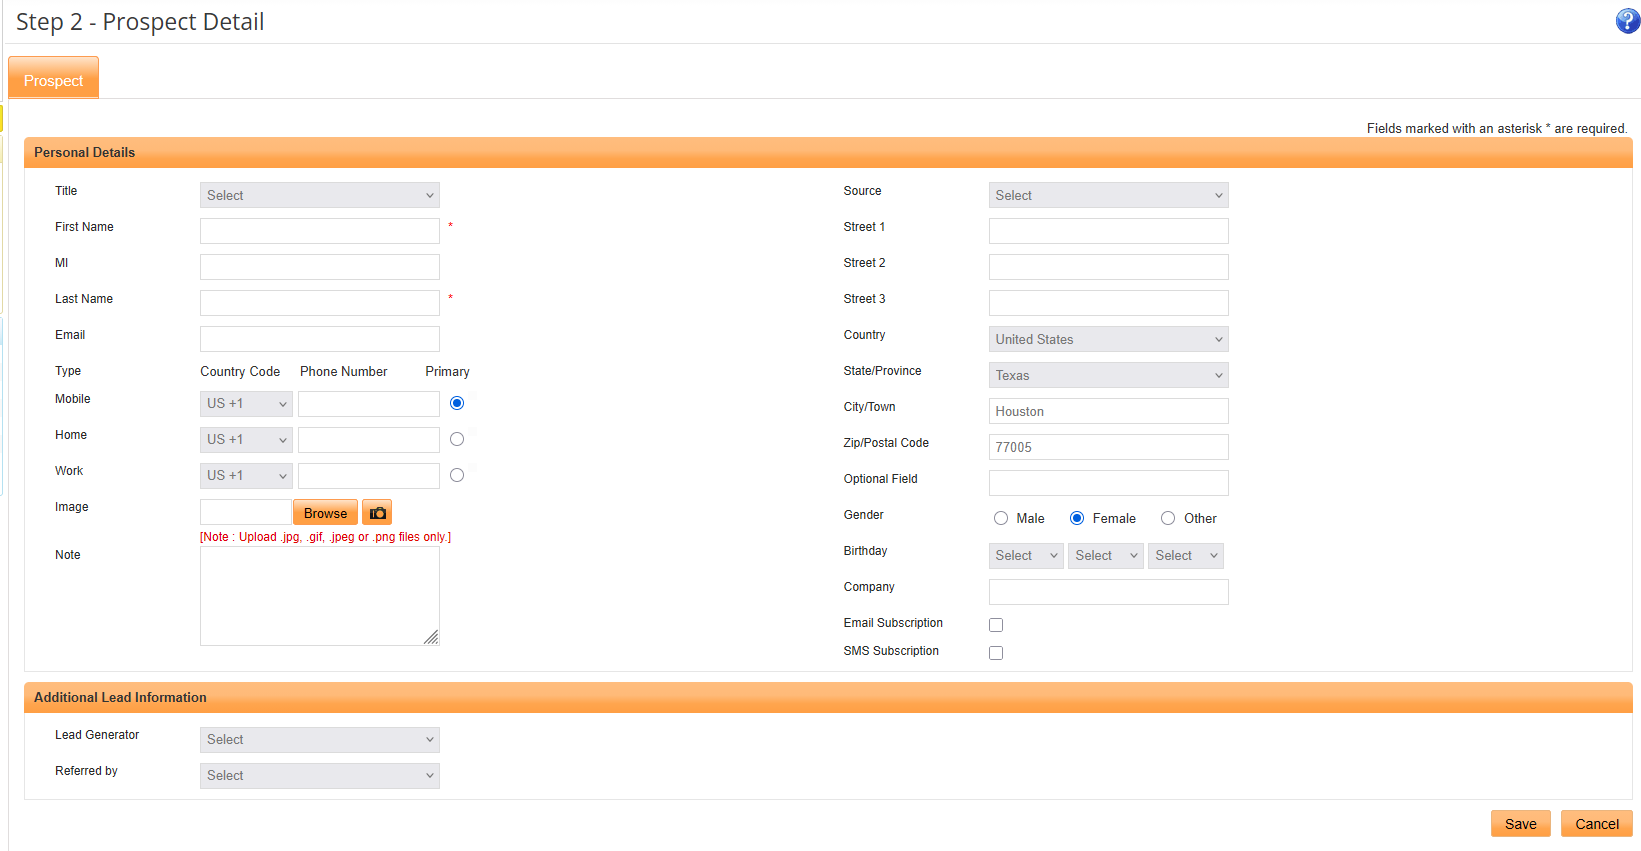
7.Click Save
8.Click Checkout
9.Continue through the Point of Sale (POS) process to complete the purchase
Note: Non-members will need to be entered as prospects, but do not require a membership to purchase a course.
Selling a Course to a Member
1.Open the member's record
2.Click the POS button
3.Click Course
4.Select the course from the list and Save
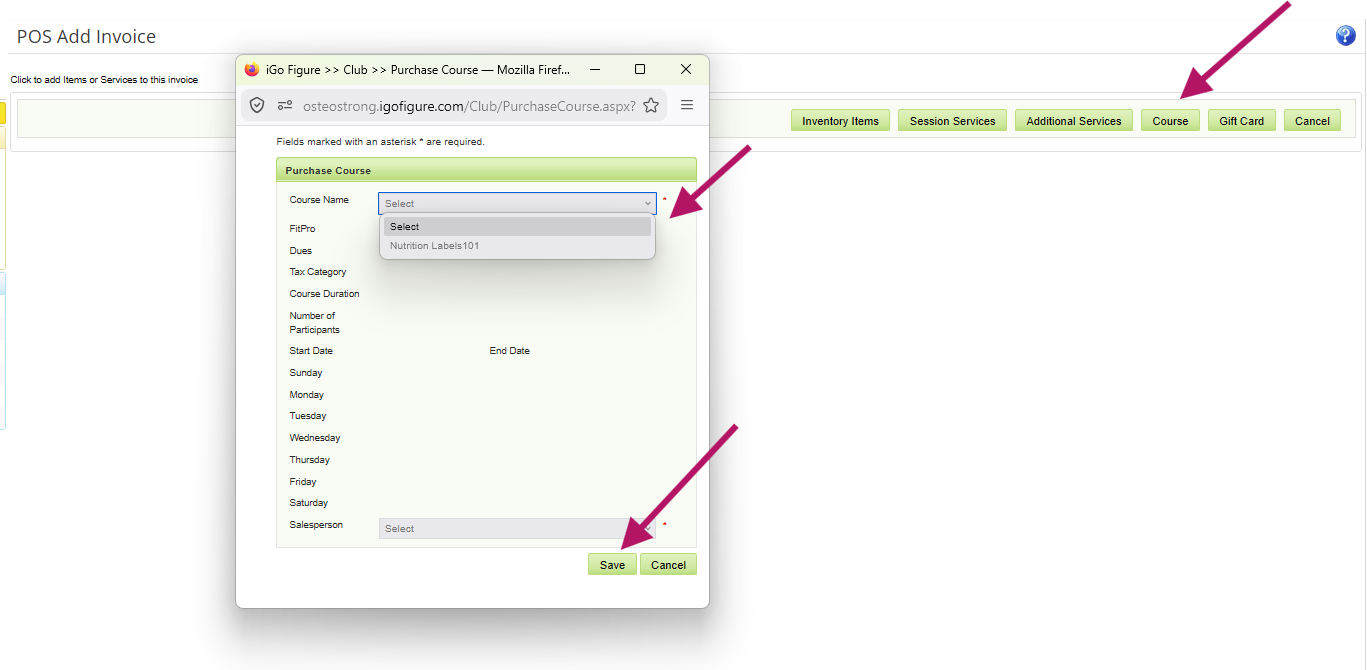
5.Continue through the Point of Sale (POS) process to complete the purchase
The course is added to the member's account upon completion of the sale.
Running the Course Report
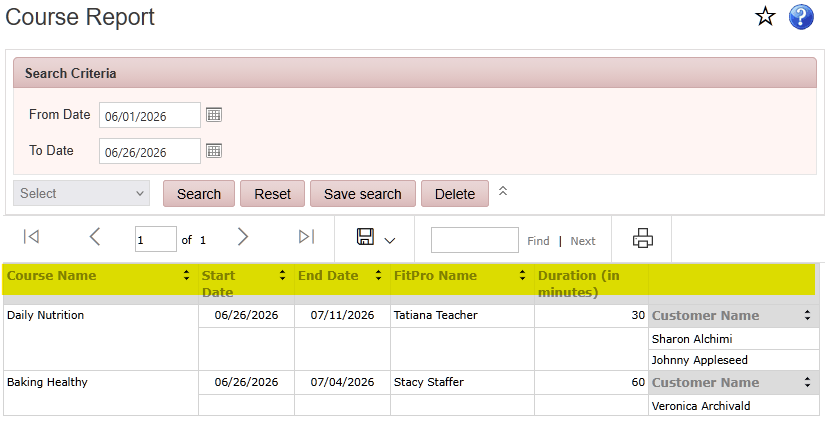
The Course Report displays members enrolled in courses and related course information.
Reports > Course Report
Notes
•Courses can be sold to both Members and Prospects
•A course must be created before it can be sold
•Course sales are processed through Point of Sale (POS)
•Use the Course Report to review course enrollments and participation
