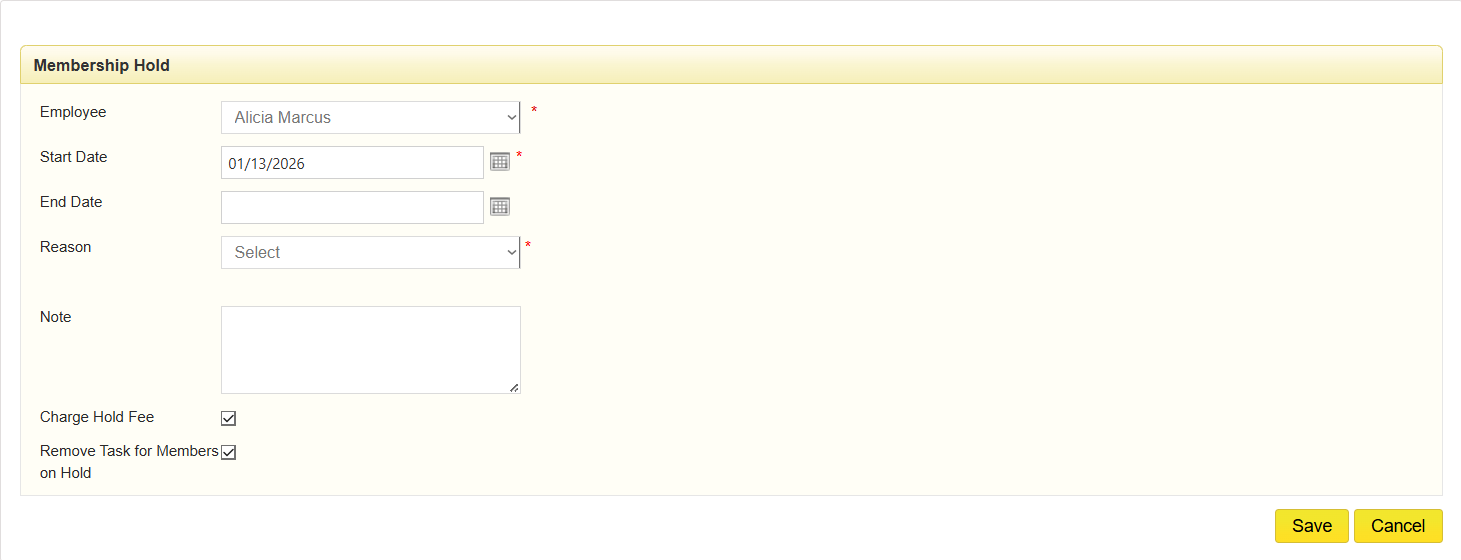
Set the following information:
- Employee - Set the employee initiating the Hold. By default, it will input the employee that is logged in. If you are not able to change this, it is due to a Security Profile setting set by your facility.
- Start Date - Click the calendar icon to configure the date the Hold begins.
- End Date - Fill in the date the member is coming back. We do not recommend leaving this blank.
- Reason - Select from the drop-down list of choices.
- Note: - This field is optional, but it is helpful to write down any relevant information.
- Charge Hold Fee - If this is checked, then a Hold Fee will be charged to the Member on their Next Billing Date only if a Hold Fee is set up in the Owners Entity.
- Remove Tasks For Members on Hold - This will remove all tasks on the calendar that the member has during their Hold period. If this is not selected, then the appointments will be kept. If the appointment is set to remind the member and the appointment is kept, those reminders will continue to be sent to the member even if they are on Hold.
Terminating a Hold Early
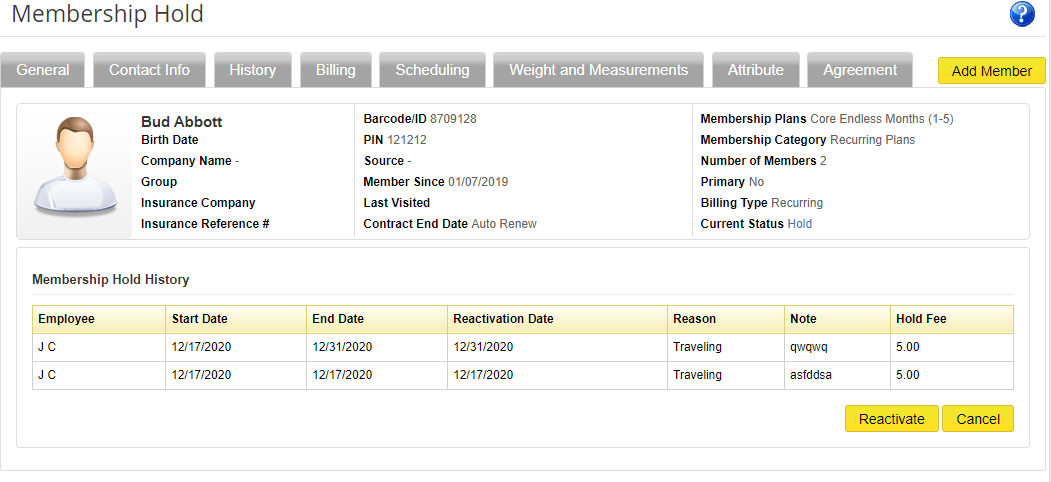
To terminate a hold early, follow these steps:
- Go to the member's record
- Click the Hold icon
 on the Relate Bar
- Click the Reactivate button on the bottom right