F109 - Credit, Refunds, and Get Payment

Overview:

Credit

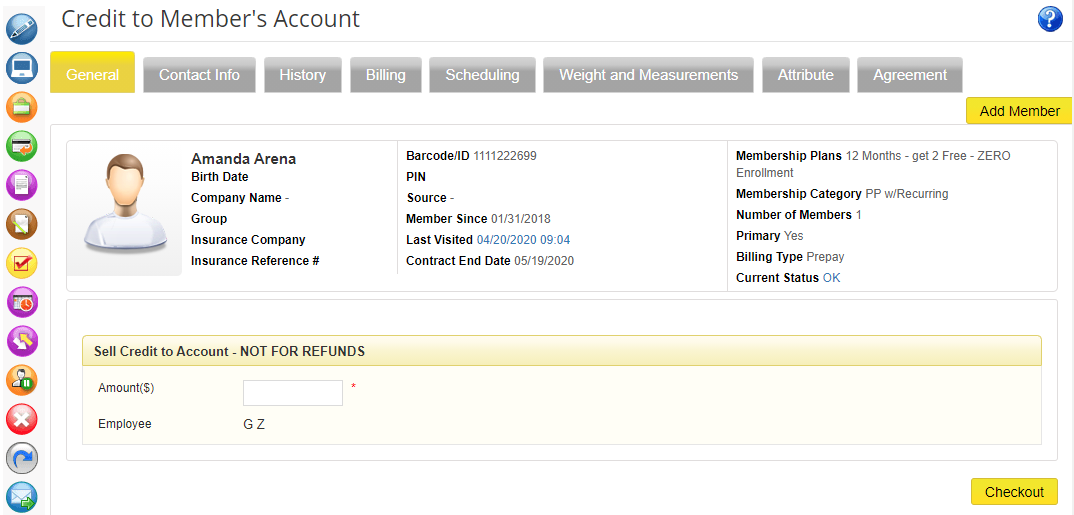
Using the Credit to Account feature allows you to add a credit balance to a member's account.

Credit can be used to purchase items and services at your center or be used to prepay a recurring membership or service before the invoice is generated.

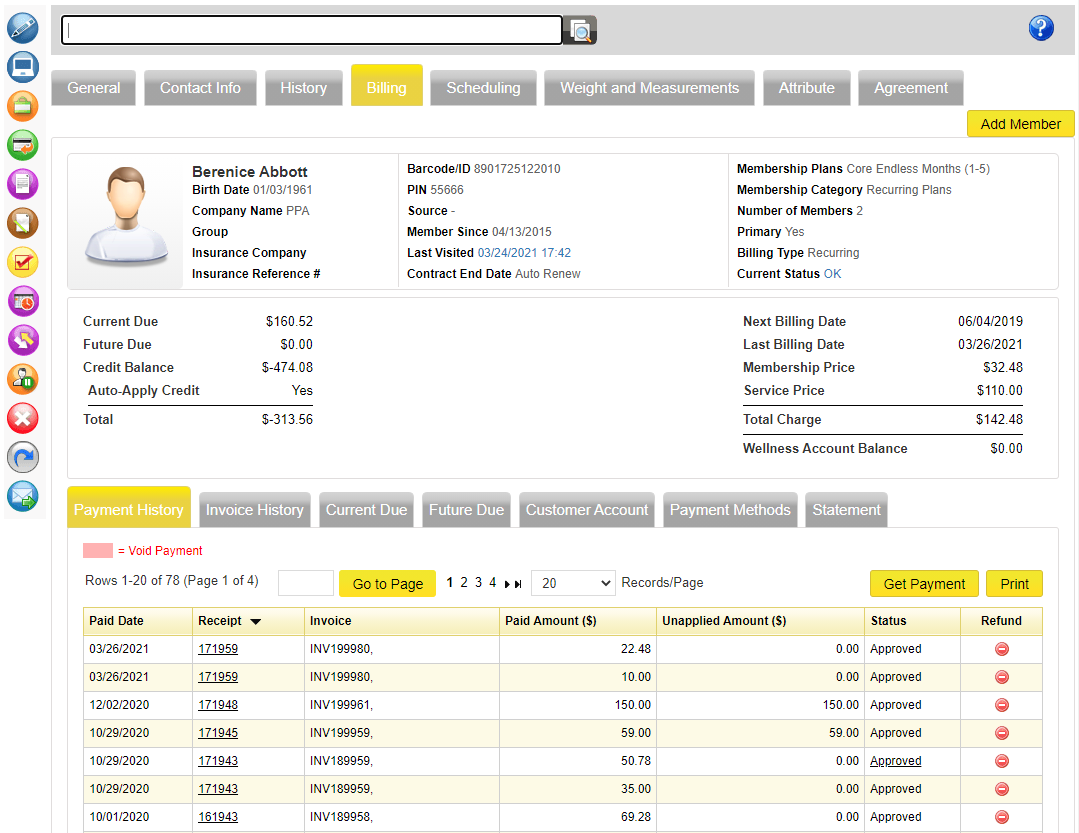
When you add a Credit to Account, a "Credit Balance" will appear under the member’s billing tab. It will show up as -$X.XX.

If the member later buys something, during checkout when you select a payment option, there will be a "Customer Account ($X.XX)" option. Select that to charge against the credit balance.

Additionally, if a member has a Credit, and the Auto Apply Credit feature is set to YES, then the Credit will be used on the members Next Payment Date.

If you would like to turn on/off the Auto Apply Credit Feature, click Edit on the Relate Bar and select your option in the "Automatically apply credit balance to future dues?" section.

To issue credit to a member's account, follow these steps:

  1. Go to the member's record
  2. Click the Credit to Account icon on the Relate Bar
>
  1. Enter the amount of credit to be added to the member's account
  2. Click Check Out
  3. Select Add Payment Method

You have some options here depending on the situation.

  1. If you are charging the member for this credit (usually done if they are prepaying), then you would input the payment or select what payment method they have saved on file.
  2. If you are giving this credit for FREE, the you will select Credit Memo (Owner Comp)

Credit is non-refundable.

Taking Credit Off an Account

If you have accidentally added Credit to a members account, the only way to get rid of it is by creating an invoice and paying it via the Credit.

To create an invoice -

  1. Select the Member POS Button on the Relate Bar
  2. Select Inventory Item
  3. You should have an inventory item labeled "Account Adjustment". Select it and change the price to the amount of the Credit you are getting rid of.
  4. Click Sell, then Checkout. DO NOT CLICK CHARGE TO ACCOUNT ON FILE.
  5. On the Checkout page, click Add Payment Method.
  6. Click "Customer Account ($X.XX)" as the payment method and Save.
  7. At this point you can add a note for this charge if needed for Reports, and if to send an email/sms to the member. Your management should tell you their policy for this.
  8. Click Process to finish the transaction.

If the member was charged for the Credit, there is no way to refund that particular invoice.

You will instead have to pick a previous invoice to do a partial or full refund.

Below is how to process a refund.
Refunds

  1. Go to the member's record
  2. Click on the Billing tab and go to Payment History
  1. On the payment history list, transactions where a refund is allowed will have a red refund button. If you do not see this button, your Security Profile may not allow it. Contact management of your facility.
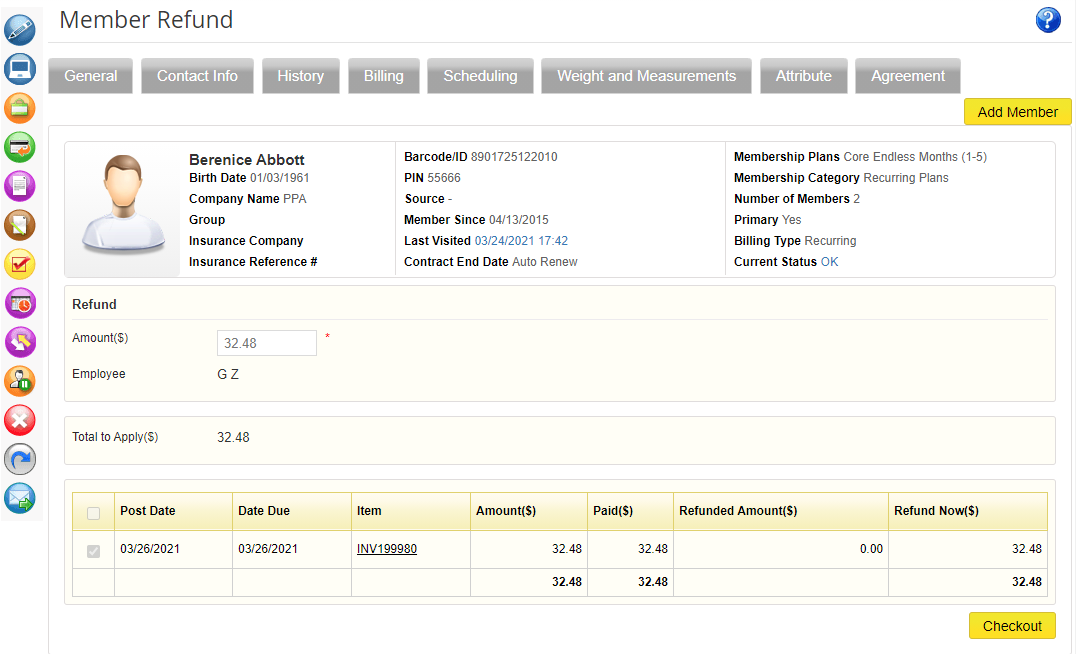
  2. Click the Refund button for the transaction you want to refund
  1. Input the amount you want to refund. You can put in less than the amount charged for this invoice for a partial refund.
  2. Click Check Out when finished
  3. You will be redirected to the Point of Sale system. Click Add Payment Method to specify how the refund will be issued to the member.
  4. If the member does not have a payment method on file saved, then the member must be present to either give the Card/Bank info, or to receive a cash refund.

Get Payment

If a member has any outstanding payments, the Get Payment function can be used to collect those funds manually.
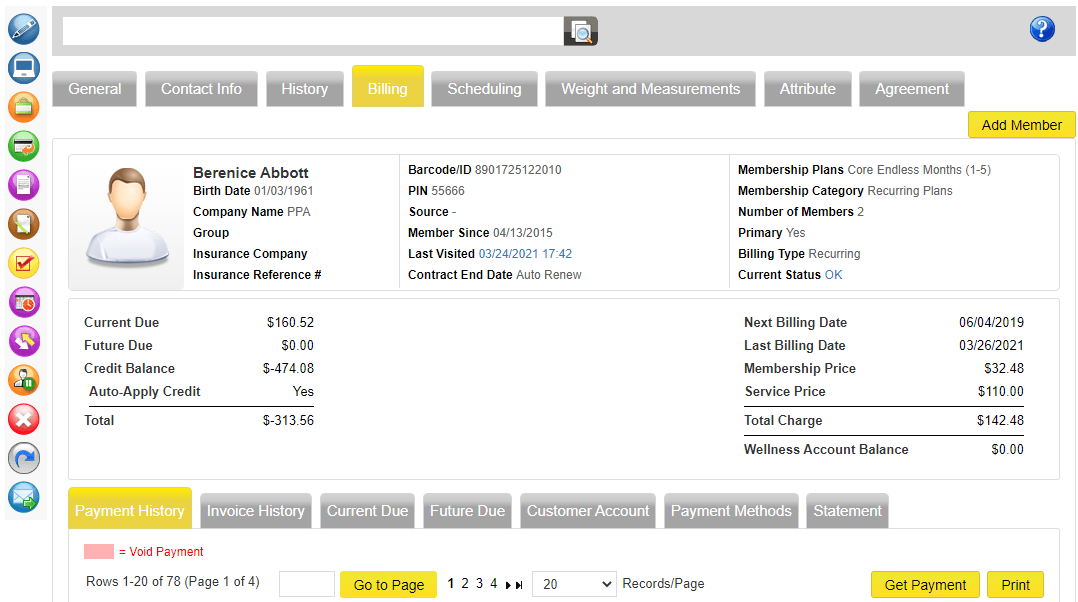
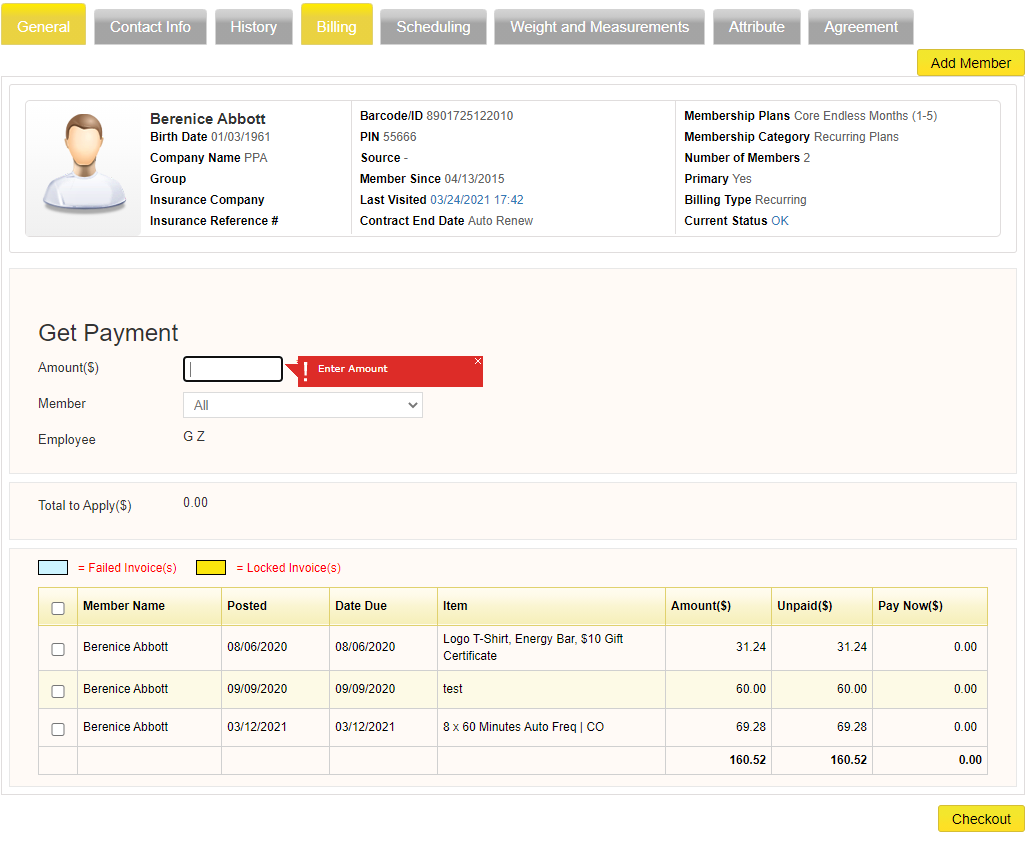
  1. Go to the member's record
  1. Click on the Billing tab and then click the Get Payment button
  1. Enter the amount you wish to collect. You will see a list of all outstanding invoices.
  2. Select the invoice the member is paying for. If only one invoice is present, the system will check it for you and not allow you to un-check it.
  3. Click the Check Out button
  4. You will be redirected to the Point of Sale Screen. Click Add Payment Method and complete the point of sale process.


We regularly update the iLearning Center; if you come across any broken links, please don't hesitate to let us know.